
The Device Information page
A Device's Information page is where you can view information and perform actions on a specific Device.
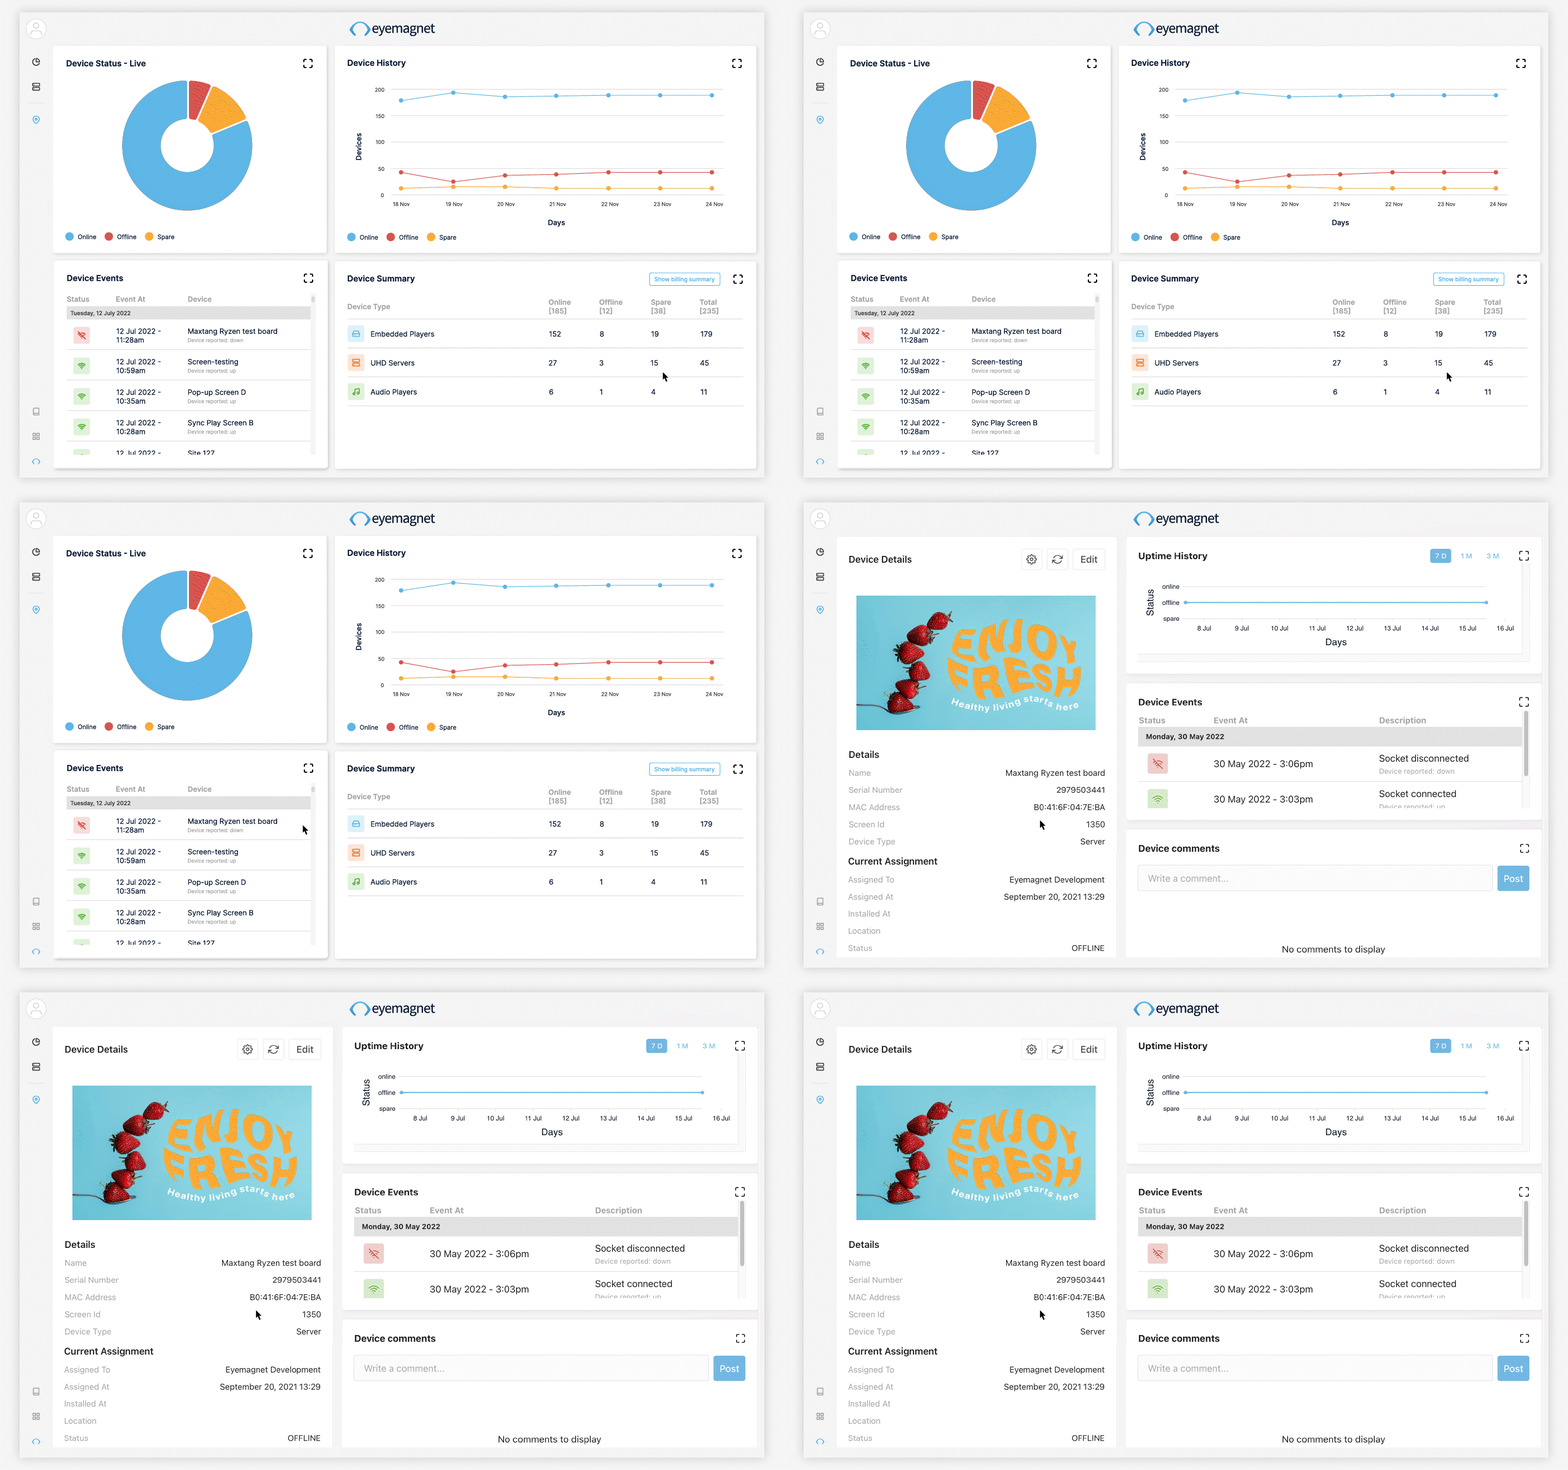
When the page opens, four different panels will be displayed; Device Details, Uptime History, Device Events and Device Comments.
Navigate to a Device's Information Page
There are multiple ways to navigate and access a Device's Information page. To navigate to a Device's Information page, follow these steps:
- From the Device List page, click on any of the Devices.
- From the Dashboard page, click on any Device in the Device Events panel.
- From the Locations page:
- Open a Location and click on the Devices At This Location button. This will open the Device List filtered to that location.
- Click on any of the Devices.
Edit Device Details
For Managers Only: Editing Device Details is only available for a user with Manager permissions.
To open and edit Device Details, follow these steps:
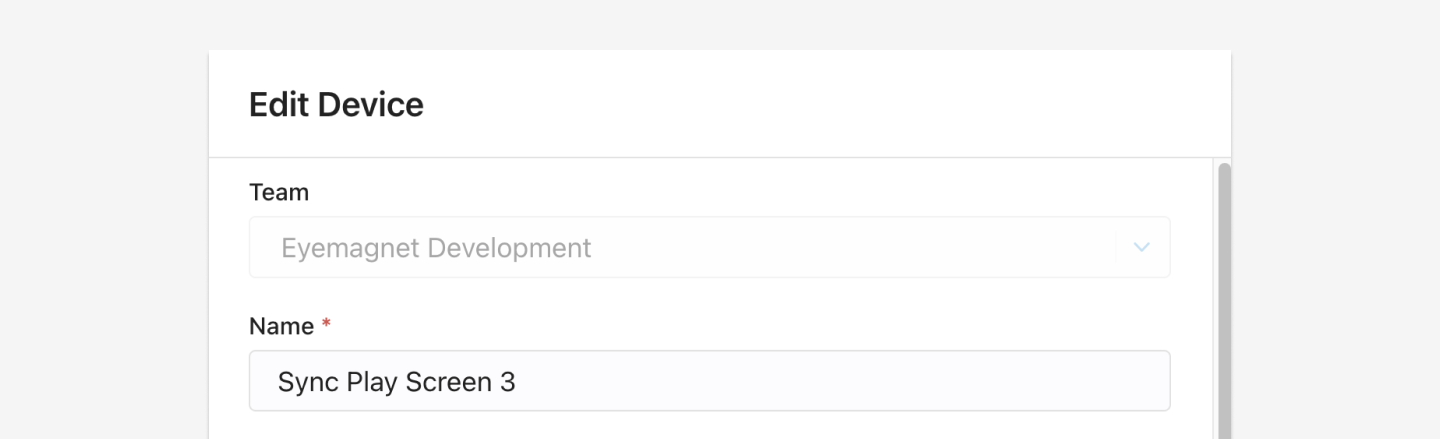
- Click on the Edit button at the top right-hand side of the Device Details panel.
- A pop-up modal will appear with all the configurations of a Device. You can now edit the Device Name and Device Location.
- Once you've finished editing the Device Details, click the blue Save button in the bottom right-hand corner.
- To cancel, click the Cancel button.
If you believe that another field needs to be altered. Please contact support@eyemagnet.com for more help.
Screenshots
A screenshot is a screen capture of the current content that is playing on a Device.
When the Device Information page opens, a screenshot will be displayed at the top of the Device Details panel. This will be a capture of what the Device was playing when the page was initially loaded.
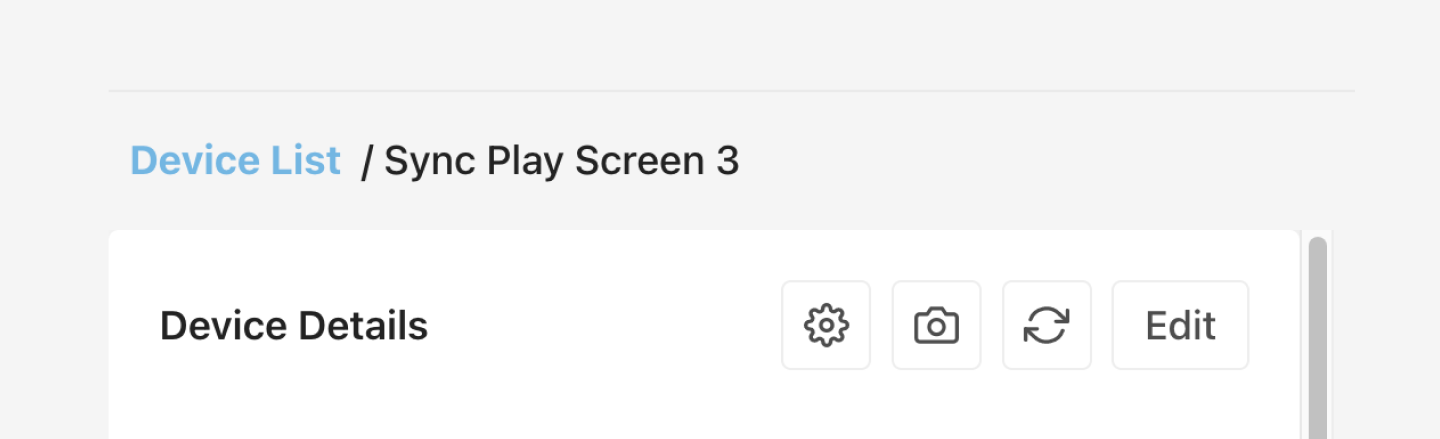
Screenshots are not real-time and you will need to use the buttons available to capture and display a screenshot.
Refreshing Screenshots
To capture and display a screenshot, you'll need to complete the two steps below:
- First, click the Camera icon at the top right-hand side of the Device Details panel. This will capture a live screenshot of the content playing on the Device.
- Next, click the Refresh icon at the top right-hand side of the Device Details panel. This will refresh the screenshot preview window.
Device Triage
For Managers Only: The Device Triage functions only appear for a user with Manager permissions.
This Device Triage is a dropdown menu containing the Sync, Clear and Reboot functions. These functions work alongside the CMS to perform these actions and can be accessed via the Gear icon at the top right-hand side of the Device Details panel.
- Sync: Pulls the latest schedule set up to play on the display.
- Clear: Removes all schedules set up on the display.
- Reboot: Restarts the display.
The CMS will automatically sync content changes periodically, but to force an instant sync, click the Sync button.
Device Events
To learn more about Device Events, click here.
Device Comments
To learn more about Device Comments, click here.