Create a Location entry
To create a Location, follow these steps:
- Click the + New button at the bottom of the Location Library.
- A new Settings panel will open, and you’ll be able to configure your Location.
- Name your Location.
- Type in the address of your Location. Once completed, the address will automatically connect with Google Maps and provide a preview of the Location.
- Next, click on the Parent Location field and select a Location. This feature is only used when setting up Location Hierarchies.
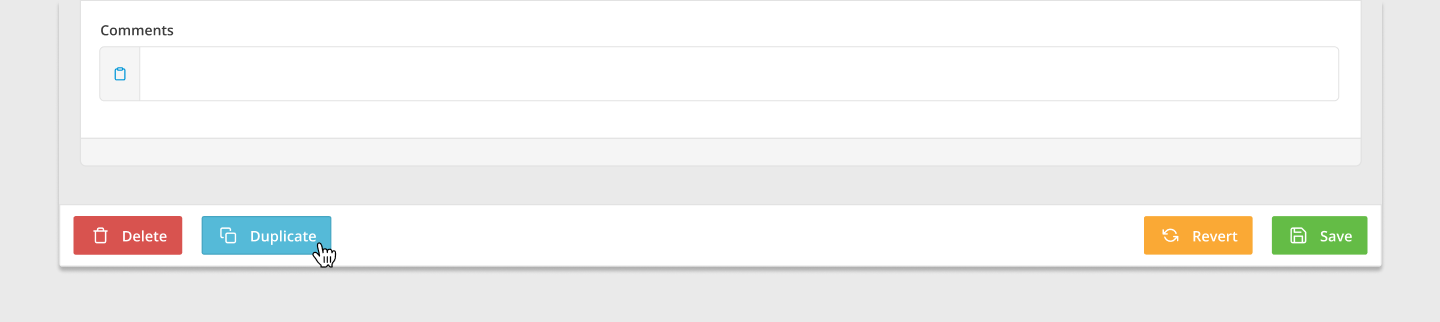
- Add any comments.
- Finally, click the Save button.
- Your Location will now be added to the Location Library.
Edit a Location
To edit a Location, follow these steps:
- Click on a Location to open the Settings panel.
- Rename your Location, update the address fields, add any comments or edit the Parent Location.
- Click the Save button.
- Your Location will now be updated with the latest changes.
When editing a Location, please keep in mind that all Media Items and Screens assigned to the Location will also be updated.
Delete a Location
To delete a Location, follow these steps:
- Click on a Location to open the Settings panel.
- Click the Delete button at the bottom left-hand corner.
- Your Location will now be deleted from the Location Library.
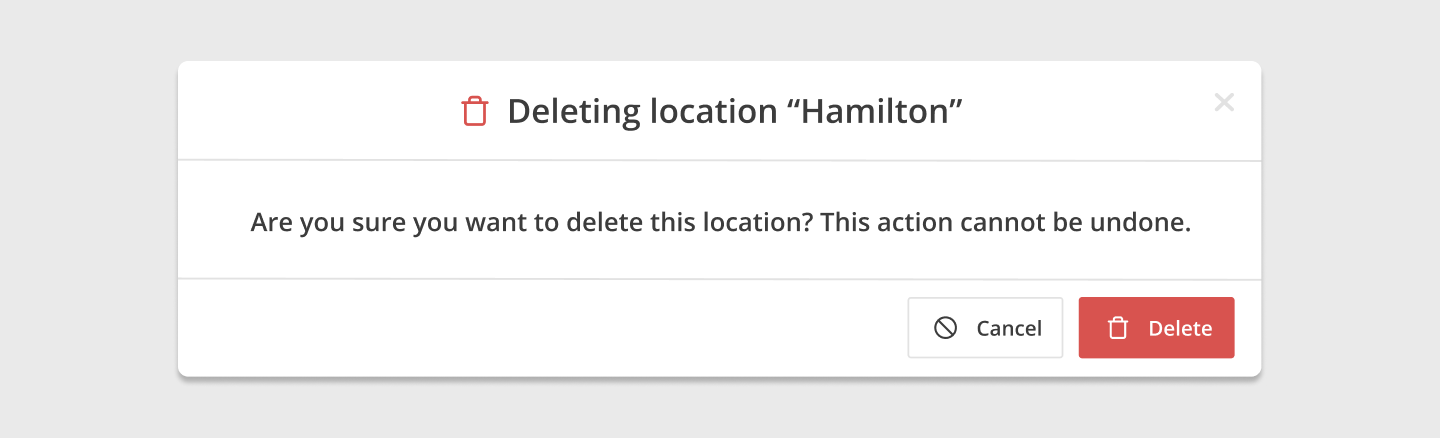
If your Location is in use, it will not be deleted. You will have to remove all Media Items and Screens assigned to the Location before you can delete the entry.
Duplicate a Location
To duplicate a Location, follow these steps:
- Click on a Location to open the Settings panel.
- Click the Duplicate button at the bottom left-hand corner.
- A new Location entry will be created.
- Rename your Location, update the address fields, add any comments or edit the Parent Location.
- Next, click the Save button.
- Your Location will now be added to the Location Library as a new entry.