
Screen Settings
To edit Screen Settings, follow these steps:
- Click on a Screen from the Screen Library.
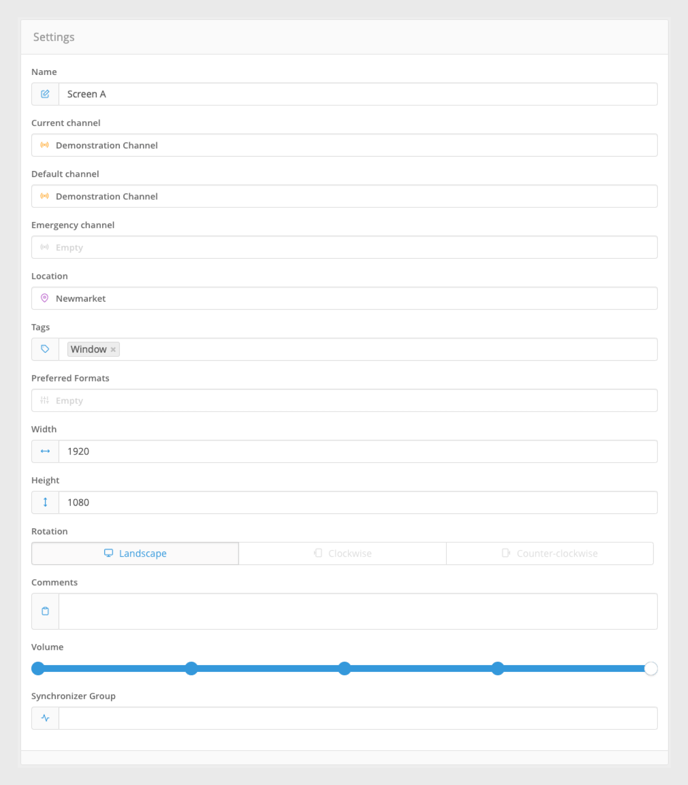
- Once a Screen has been selected, the Screen Information panel will be displayed. In this section the following parameters can be edited:
- Name: Changes the name of the Screen in the CMS.
- Current Channel: Sets the Channel that the Screen will play.
- Default Channel: Sets the Default Channel that the Screen will play upon reverting to default on the Dashboard.
- Emergency Channel: Sets the Emergency Channel that the Screen will play upon reverting to an emergency on the Dashboard.
- Location: Sets the Location of the Screen.
- Tags: Assign Tags to the Screen. Used in conjunction with Media Tags within Playlists to target specific Screens.
- Preferred Formats: Displays a Screen's preferred format. This feature is only available on compatible Samsung SSP products.
- Rotation: Sets the orientation of the Screen, i.e. landscape, portrait etc.
- Comments: Allows free text for any commentary or notes around a particular Screen.
- Volume: Sets the output volume of the Screen.
- Synchronizer Group: Used when setting up Multi-Screen Playback. This feature is only available on compatible Samsung SSP products.
- Once you've finished making changes, click the Save button.
- Your Screen will now be updated in the Screen Library and any changes made will take effect.
Please keep in mind, that changing the Rotation settings may result in content being displayed upside down.
Screenshots
To view a Screenshot, follow these steps:
- Click the Camera icon above the Screen Settings.
- This will display a real-time Screenshot of what content is currently playing. This is used to remotely confirm what is showing on the screen.
- To refresh a Screenshot, click on the image. The screenshot will automatically be reloaded.


The Screenshot icon will only appear if your Screen or Device is VPN enabled.
Screen Status
The WiFi icon next to the Camera icon will display the online status of the Device powering a Screen.
- As the Screen is first being checked, a loading icon will appear.
- This will turn into a green WiFi icon if the screen is online or a red WiFi icon with a cross if the Screen is offline.
- To re-check the Status of a Screen or Device, click the Wifi icon.


The Screen Status icon will only appear if your screen or device is VPN enabled.
Impression Reporting
Underneath the File Information is the Impression Reporting panel. An Impression is a single time media has played on a screen.
Once the Screen has been assigned a Channel to play, the impression information will build over time.

If the selected Screen has only recently been assigned a Channel, this section will initially be empty as Playback statistics need to be gathered first as Impression Reporting is not a real-time function.
Update the Time Range
To update the Time Range, follow these steps:
- Select a Start and End date & time to query.
- The bar graph will dynamically display hours, days, months or years based on the range selected.
Each individual Media Item set to play on the Screen will appear as a different colour on the bars. Hover over any section to view detailed information relating to playback within that period:
|
Total impressions |
The total amount of times the content has played. |
|
Seconds total |
The total amount of seconds the content has played for. |
|
Share of voice |
The total percentage of the time the content has played for compared to other Media set to play on the Screen. |

Download a .CSV
To download a .csv file, follow these steps:
- Click the Export button at the bottom right-hand corner of the Impression Reporting panel.
- A .csv file will download to your computer's file browser with all of the impression information for the selected period.
You can also see Impression Reporting within the Media Item Settings.